Hello! Unlike my previous psot in the series, I’ve now realized that I should take an entry into explaning how to setup your coding enviroment and have everything before we actually get into coding, so this entry will help you with that!
Ok what do I actually need?
You’re going to need some things:
- You need Git installed in your computer. Git is a version control program that saves all of your progress in a tree like manner, and either save it locally or online (which means you can get the code from other people and modify to your own whim).
- A GitHub Account. Mind you, Github and Git are different concepts, Github is basically a giant storage to store all of your Git branches online so people can contribute to them. Git is what does all the heavy lifting of managing the versions of your code.
- Some coding enviroment like Visual Studio Code. It’s lightweight and has easy integration with Git and Github (if you have them installed in your computer)
- Beginning-Medium knowlodge of Javascript; if you’ve been anywhere near the internet you’ve certainly heard about this language, it runs on your browser, but due to dependencies (and the server we’ll use to simulate the site) we’ll actually need to run it on your own computer instead. Don’t worry, because we also need…
- Node. Node is a runtime enviroment that is basically a browser that only knows how to run Javascript, and nothing else. We’re going to run a server on there so your browser can get files without having issues with CORS policies or stuff like that.
- NPM. NPM or Node Package Manager is a package service that is a neccesity when working with any javascript projects. It handles all the libraries needed for a project and helps with command shortcuts and other stuff.
- Granted, NPM is not the best package manager to work with, but it’s the most common solution and its the one used by Skud’s website
- Your pai sho variant’s rules ready for reference. I’m assuming you’ve already played with your variant in SkudPaiSho’s playground and already know all the rules of your game.
- You’ll also need to think and translate your rules into code, so if you have any complicated rules, then you’re out of luck. But hey! There are many people in the community who can help you with any problems you have!
From now on I’ll be assuming you have knowledge in all of these things. Any questions you may have can be found easily on youtube, some channels I recommend are Awesome, Web Dev Simplified and Fireship.
Also here’s a crash course on git:
You got everything installed? Good, next up…
Getting a copy of the code
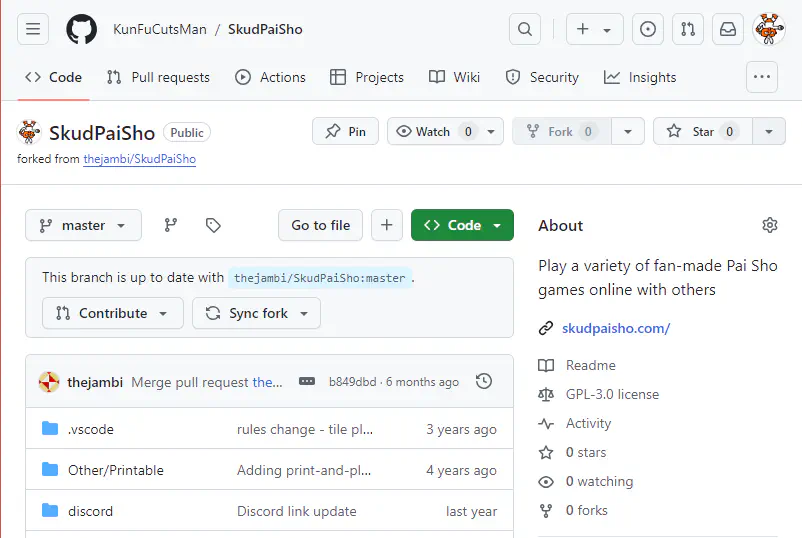
Now, the process is relatively simple, which because I’m lazy I’ll just link Github’s offcial guide on how to create a fork over here. This guide should cover everything much better than I would normally.
The end result should give you a fork like the following:

You also need to get a local copy in your computer so you can test everything, so that by copying the repository on your computer using git. That is also on the guide I referenced earlier.
In the end, you should have somewhere on your computer a directory like the following:
        └─ .
   ├─ .eslintignore
   ├─ .eslintrc.json
   ├─ .importjs.js
   ├─ .vscode
   ├─ android-icon-144x144.png
   ├─ android-icon-192x192.png
   ├─ android-icon-36x36.png
   ├─ android-icon-48x48.png
   ├─ android-icon-72x72.png
   ├─ android-icon-96x96.png
   ├─ apple-icon-114x114.png
   ├─ apple-icon-120x120.png
   ├─ apple-icon-144x144.png
   ├─ apple-icon-152x152.png
   ├─ apple-icon-180x180.png
   ├─ apple-icon-57x57.png
   ├─ apple-icon-60x60.png
   ├─ apple-icon-72x72.png
   ├─ apple-icon-76x76.png
   ├─ apple-icon-precomposed.png
   ├─ apple-icon.png
   ├─ board.svg
   ├─ board_darkmode.svg
   ├─ browserconfig.xml
   ├─ changelog.md
   ├─ discord
   ├─ favicon-16x16.png
   ├─ favicon-32x32.png
   ├─ favicon-96x96.png
   ├─ Fire Pai Sho Rules.pdf
   ├─ FirePaiShoRules.pdf
   ├─ GameControllerInterfaceReadme.md
   ├─ index.html
   ├─ index_https.js
   ├─ js
   │  └─ PaiShoMain.js
   │  └─ ...
   ├─ LICENSE
   ├─ manifest.json
   ├─ minify.sh
   ├─ ms-icon-144x144.png
   ├─ ms-icon-150x150.png
   ├─ ms-icon-310x310.png
   ├─ ms-icon-70x70.png
   ├─ Other
   ├─ package-lock.json
   ├─ package.json
   ├─ README.md
   ├─ register
   │  └─ index.html
   ├─ SkudPaiSho_rules.pdf
   ├─ sounds
   ├─ style
   ├─ test.crt
   ├─ testkey.pem
   ├─ tgcset
   └─ WINDOWS_ALT_MINIFY.txt
Seems big huh? And that’s excluding all of the stuff that’s inside the directories!
We’re not going to work on the master directory, which is what you see right now. Open up the console on your directory and type the command
git branch --list
what you get should be something like:
        * master
  parcel-parcelrc
  parcel-update
The branches listed may vary because of time, but the master and parcel-update branches will always be there.
You’ll be working in a branched version of parcel-update, so first run git switch parcel-update and the result should get a message similar to this one:
        Switched to branch 'parcel-update'
Your branch is up to date with 'upstream/parcel-update'.
Before you touch anything don’t forget to create a new branch based on upstream/parcel-update, so run the following commands:
        git branch <YOUR_BRANCH_NAME_HERE>
git switch <YOUR_BRANCH_NAME_HERE>
“<YOUR_BRANCH_NAME_HERE>” is of course whatever you want it to be, I highly recommend you use Kebab case when naming it. Name it the name of your variant so its easier to identify.
Remember you can always
git branch --listif you’re lost on what branch you’re actually on.
Finally run two final commands:
        npm i
npm run start
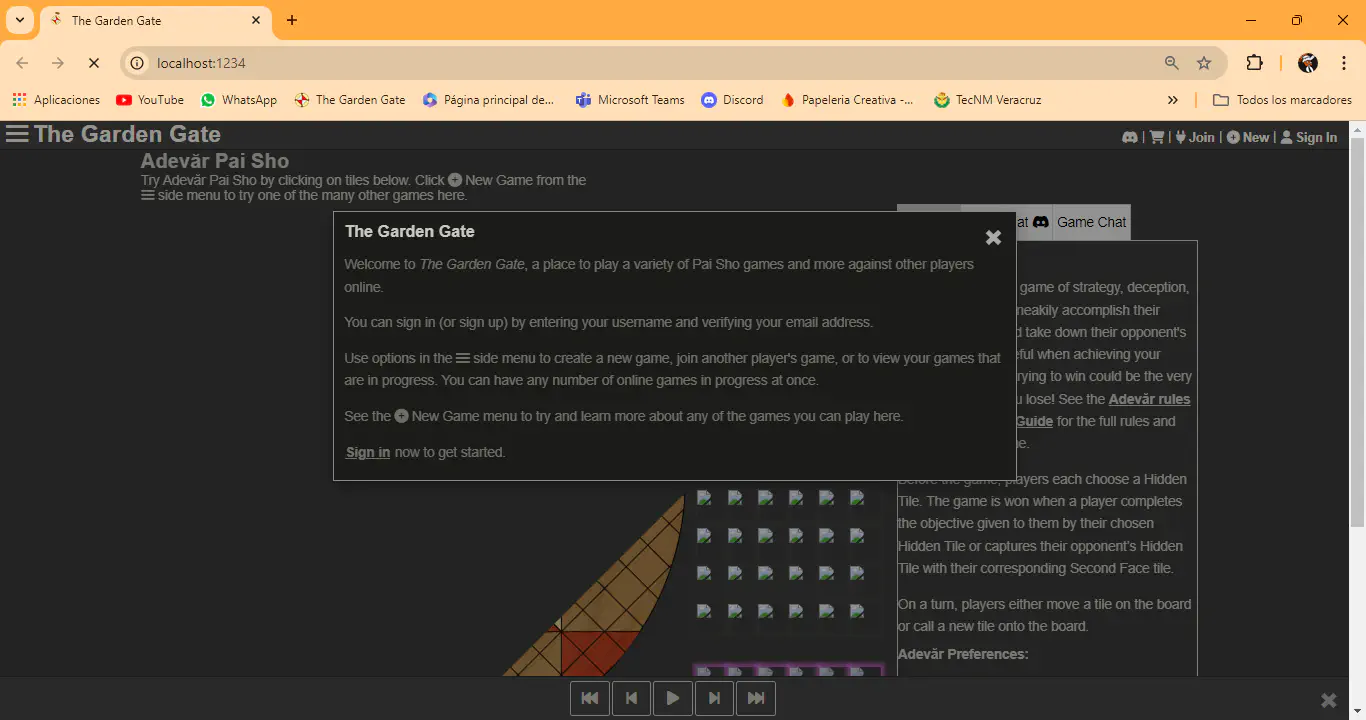
And watch as your browser of preference greets you with…
Behold! A forked website

A forked website!
A 1 IN 5 CHANCE OF YOUR SITE BREAKING BECAUSE IT STARTED WITH GINSENG PAI SHO!
I also have some things to clarify here:
-
The command
npm runis a shortcut for whatever is labeled in the filepackage.json. If you look there you’ll see we’re using a library called parcel that is also in charge of making the server.- Parcel is also going to be vain of your existence.
- When in doubt, stop the server and run
npm run buildthennpm run start.
-
You’re also going to get a lot errors that will break the site. For some reason Parcel does not identify global commands from HTML tags that are introduced as strings; which in the codebase is around 50% of them.
- You may need to add some lines that are like the following in
js/PaiShoMain.js
window.someFunction = someFunction;- DO NOT ADD THOSE LINES IN ANY COMMITS. They will only be there for development porpuses and should be deleted when you’re done coding.
- You may need to add some lines that are like the following in
-
You’ll be working almost exclusively in a directory called
js/pai-sho-variant(“Variant” being the kebab of your variant, of course). You’ll also modify some parts ofjs/PaiShoMain.jsandjs/GameOptions.js. But we’ll get there when we get there. -
Commit every advancement you make and upload it to your upstream on github. Not only will this keep a history of your work, but it will also give others the chance to colaborate with you
- They’ll just have to follow the same process as you did when forking your own codebase, or get a copy of it.
Final thoughts
And that’s about it for today. I apologize if this took so long for me to write, I’ve had several school assignments that had to take priority. I initially started writing this on September 12th, but couldn’t find the time to finish it.
Next entry we’ll actually code something useful.